How to: Setup email Notifications in the Project Plan
For Professional Edition
Notification for Professional Edition is system wide. Once Notification is setup it will apply to all projects.
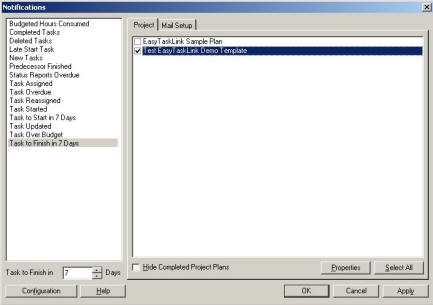
1. From the Project Center select Utility…Setup Notifications. The Notifications screen is displayed.
· The left panel of the Notifications screen is the type of the Notifications that the Project Manager would like to receive from the project.
· In the Project tab is the list of projects that the Project Manager can setup notifications.

2. To setup Notifications. Highlight the Notification Types in the left panel then check the checkbox next to the Project Plan that you want to receive notifications. Click the Apply button will set the Notification.
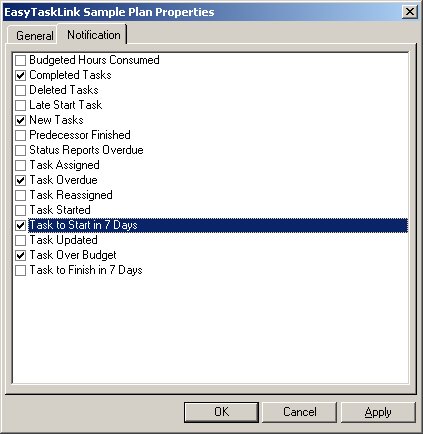
3. To view the type of Notifications that are set for the Project Plan. Highlight the Project Plan then click the Properties button the following screen is displayed. The Notifications with the check marks are the type of Notifications that are set for the Project Plan.
4. From the Mail Setup tab you can configure the email addresses and decide who should be receiving the Notifications.
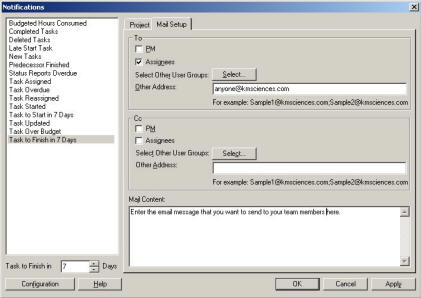
i. Check the PM or Assignees checkbox if you want them to receive the Notifications or send a carbon copy to them.
ii. Insert other email addresses in the Other Address box for additional individuals to receive the notification.
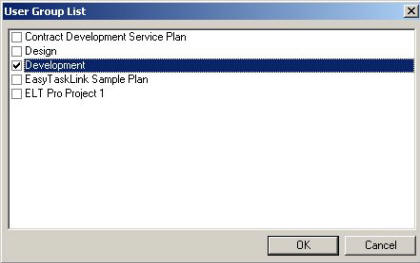
iii. Click the Select button the User Group List screen is displayed. Check the checkbox for the projects or group users that should receive the notification.
Note: To create a user group, use the Utility...Users and Groups from the Project Center.
4. Input your email notification message in the Mail Content box.
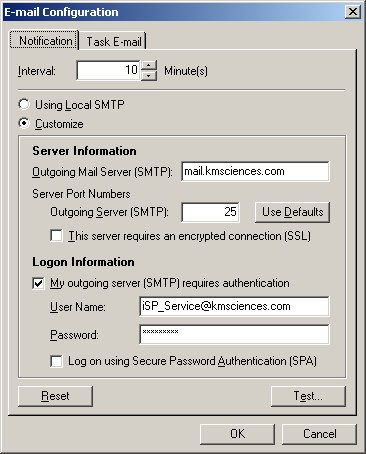
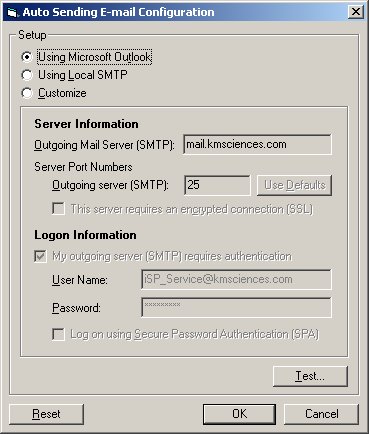
5. Click the Configuration button to setup your SMTP server. EasyTaskLink used KM Sciences Outgoing email as default. You should consult with your Administrator and setup the SMTP.
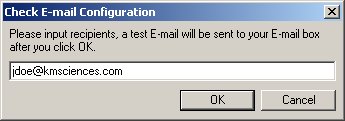
6. Use the Test button to the test your email connection is done correctly.
7. Click the OK buttons in the Notifications screen will save the Notifications setting and return to the Project Center.
For Workgroup Edition
Notification for Workgroup Edition is setup by project. Each of the project has it own type of notification setting.
1. From the Project Center highlight the project plan then select Utility…Setup Notifications. The Notifications screen is displayed.
· The left panel of the Notifications screen is the type of the Notifications that the Project Manager would like to receive from the project.
· To setup Notifications. Highlight the Notification Types in the left panel then check the Enabled checkbox that you want to receive notifications.

i. Check the PM or Assignees checkbox if you want them to receive the Notifications or send a carbon copy to them.
ii. Insert other email addresses in the Other Address box for additional individuals to receive the notification.
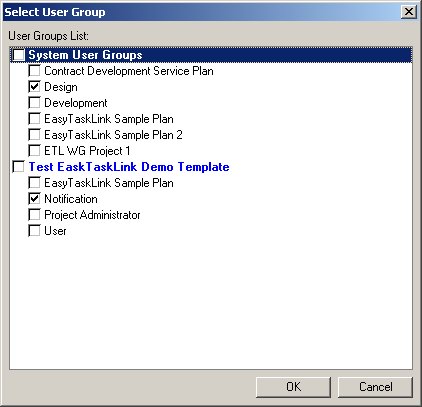
iii. Click the Select button the User Group List screen is displayed. Check the checkbox for the projects or group users that should receive the notification. Click OK to return to the Notifications screen.
3. Notification Configuration can only be set in the Server computer. To setup the Interval time and SMTP email service. From the Start menu select Programs... EasyTaskLink...Utility...FileService. The EasyTaskLink File Service screen is displayed. Click the Configuration button and select Email Configuration. You should consult with your Administrator and setup the SMTP.
